


quick-print the whole thing for reference)
General Motors
TurboHydramatic 350
1969-1979
More than 25 million were produced;
used in cars, vans, trucks, and motorhomes.
Buick - Cadillac - Chevrolet
GMC - Oldsmobile - Pontiac
The number-one choice in GM-powered hotrods.
Can teach you. Build yours yourself, with help!
I am a retired rebuilder and can assist you with
your bench (rebuilding) job, at your location in
the San Fernando Valley or the Los Angeles area.
It is far easier than most engine guys think it is.
I can quickly help you or teach you this knowledge.
Build it yourself, you know that
there were no shortcuts taken.
And it is FUN!
I will help with the real 350s of the years above,
but NOT with the weak '350-C' models that followed.
(The 1980 to 1986 'C' electronic lock-up
models
were introduced to
supposedly
improve
fuel economy, but
the modifications also lowered
the reliability & strength of
the transmission.)
TRIVIA: most of the vehicles that came
with TH-350s had chrome bumpers!
turbo350only.com
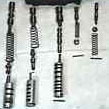
Rebuilding steps:
- disassemble completely
- steam-clean case, rear housing, and pan
- obtain rebuild kit and any needed hard-parts
- rebuild all components
- reassemble
Tools needed:
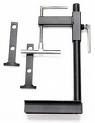 #2 (left), #3 (right)
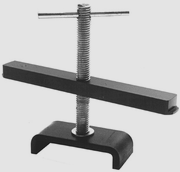
- pump-puller
- clutch-drum compressor
- 350 rear-piston tool T-0151
- snap-ring pliers (Snap On's srp1cp)
- seal tools
- ratchet, 1' extension, 9/16" & 1/2" sockets
- 9/16" & 1/2" wrenches
- razor blade
- shift seal tool T-1001
- accumulator cover tool
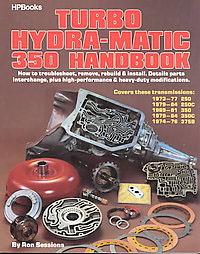
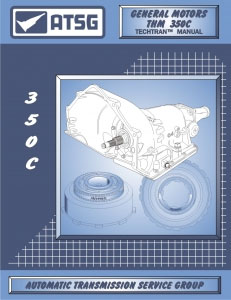
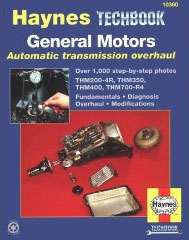
3 popular books for rebuilding 350s:
(left)
Turbo Hydra-Matic 350 Handbook
by Ron Sessions
(middle)
ATSG Techtran Manual 350/350C
by Automatic Transmission Service Group
(right)
Haynes General Motors
Automatic Transmission
Overhaul Manual 10360
by Godfrey/Haynes
Find them on Amazon.com or with Google.
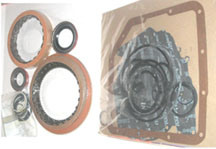
Supplies needed for a rebuild:
- assembly lube
- rebuild kit and any needed hard-parts
however, I keep on-hand small clips and several
other things sometimes lost during the process!)
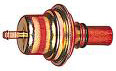 MODULATOR 'SECRETS'
If you have an 'adjustable' modulator,
the shift-timing adjustment screw
is down the vacumn nipple, the
hollow tube at the left end above,
pointing towards the rear of the vehicle.
To make it upshift a little later (higher mph),
turn the screw in / to the right.
Slightly later shifts are popular for when towing
or carrying a heavy load, keeping the transmission
in the lower gears for a few extra miles per hour.
If you get a drop of transmission fluid when
you pull the rubber hose off of this left end,
the modulator is bad and it is letting trans
fluid be sucked up into the intake manifold.
This often explains why you
needed to add fluid occasionally yet
there was no leaking on to the ground.
If the modulator is not plugged into
proper vacumn, the trans will shift very late.
It goes to the intake manifold,
not to the carburetor.
With the engine idling in park, vehicle supported
safely, pull off the hose at rear of the modulator.
Feel for light suction from the hose end that
had been on the modulator. No suction =
no vacumn = will not shift properly.
A 350 rebuilding secret:
There are NO adjustments
made during a 350 rebuild:
simply, the right parts have to
go back in using the correct order.
Example of a
 rebuild kit
Where many installations go bad-
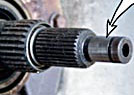
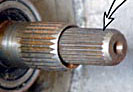
TORQUE CONVERTER INSTALLATION :
If the torque converter is not 'in'
all the way (some use a '3 clicks'
method to determine this) prior to
the bellhousing bolts being tightened,
the converter's hub can break the pump
gear, leaving the transmission useless.
A clue: if you can get your fingers in between
the bottom front of the trans case and the
torque converter, before the 6 bellhousing
bolts are in, it is not in all the way.
A trick: to keep the the torque converter locked
deep into the transmission pump while it is
wobbling on the jack or being lifted up to the
engine block, so it doesn't shudder out forward,
use a 3/8" wrench attached to a torque converter
dust-cover hole using a dust-cover bolt. Angled
correctly, it is like keeping a finger gently
pushing against the converter, lightly holding it in.
A tip: slowly pour a quart of trans fluid into
the torque converter before inserting the
torque converter into the transmission.
A reminder: one of the usually most-worn bushings
in a 350 is that in the pump body that the converter
hub fits into. Be sure to replace this bushing if not
using a new replacement pump body & gears.
See photos of a
 350 rebuild!
Want to see some outstanding photos of a 350
being rebuilt? These are not from me, but by a
knowledgeable builder in Texas. Here is a link
to a forum he has them all posted on: click here.
350 SHIFT KITS (coming soon)
 On DVD: a 350 rebuild
GM Turbo 350 (1969-1986)
Transmission Rebuilding DVD
www.LearningByDVD.com
HEAVY-DUTY 350 (coming soon)
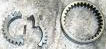
The most popular HD 350 parts:
--case-hardened intermediate clutch outer race
--heavy-duty sprag on the direct drum
--hardened input shaft
--metal pump-stator rings
TO PAINT OR NOT TO PAINT
(coming soon)
Paint causes heat-retention issues?
Emergency 350 rebuild-parts that I keep on-hand:
(things that don't come in a rebuild kit but often get
lost or damaged during a rebuild, or seals/bushings
that sometimes get damaged during the rebuilding)
- front seal 44070 / 38151V
- rear seal 44074 / MC248
- pump-bolt washer gaskets
44309 / 13268A - center-support anti-clunk spring
D74639 / D61915 - pump bushing 44034 / 8005
- pump pressure screen 44012 /
- governor screen 44014 /
- steel 1/4" valve-body check balls
A44741-5 / 13924S - detent wire link 44997-7
- steel plates for forward & direct clutches
44126 / 35100 - thrust washer kit, complete set
44200 / K35907 - steel plates for low & reverse clutches
44134 / 35101
- speedometer gears (plastic)
- speedometer gear clips,
wide M463FB / 35226B and
thin M463F / 35226 - rear piston clip ring
- speedometer latch
- front planet clip
- clip for direct-drum springs
- pump-stator rings
- Transjel assembly lube M465TJ
See www.transtar1.com
to find parts in your area.
To see an exploded view of a
Turbo 350 transmission,
click HERE

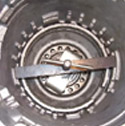
350 Governor
Found under a round cap on the driver
side of the transmission, just forward of the
extension housing, it often is a problem source.
It can be inspected with
the transmission fully installed.
The first 2 things to check:
--the plastic gear at the skinny end
--the moving valve inside the long shaft
(more to be added here later)
turbo350only.com
Need to call me to discuss a 350?
Call
(Area Code eight-one-eight)
eight-eight-three, six-nine-six-nine
Ask for Peter
Need to read an 8-page TH-350
parts catalog and exploded-view diagram?!
Our friends at Transtar have
one here that you can
click to download:
(This is their main catalog;
go down to the 4th choice
(Domestic- GM),
click to download it;
then open it--
the Turbo 350 section has
pages numbered
at their bottoms
of 30 through 37,
with the title '350,350C' ):
Click Here
It shows every 350 part,
and it has their part numbers
so you can order them from Transtar.
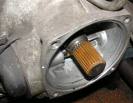
Here are the 3 types of pan filters:
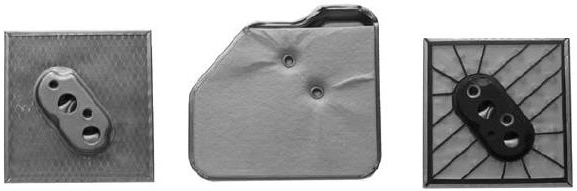
brass ----- felt ----- nylon
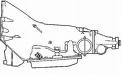
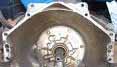
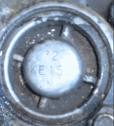
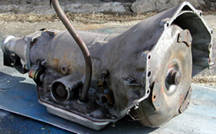
Here is your 350
While the transmission is out of
the vehicle, inspect the flexplate.
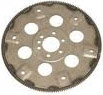
It is bolted to the
back of the engine;
the starter motor turns
the large gear welded
to its outer edge.
Stress-cracks are very common
between the crank bolt holes
and the weight-reduction holes
or the torque-converter bolt holes.
Breaks here are sometimes a
source of 'mystery clanking'.
Faster and cheaper to replace
the flexplate while the trans is out.